GAS DRYER INSTALLATION: A TSSA EXAM GUIDE
A code-based guide to gas dryer installation for Ontario TSSA exam candidates. Covers site assessment, connector rules, venting, pressure testing, and commissioning under CSA B149.1.
You walk into a laundry room for what looks like a routine hookup. New dryer on site, shutoff nearby, vent in the wall. Then the exam part of your brain kicks in. Licence scope. Approved connector. Shutoff location. Vent material. Isolation for testing. That is the right reaction, because a gas dryer installation is one of those jobs that looks simple right up to the moment an inspector asks you to justify each step against CSA B149.1 and Ontario Regulation 212/01.
In Ontario, this work is regulated gas work. The install has to be done by a TSSA-certified gas technician working within licence scope, and that point matters on the exam as much as it matters in the field. Candidates often lose marks by treating a dryer like a basic appliance swap instead of a full code exercise with legal responsibility attached to it.
A proper install starts before you touch a wrench. Confirm who is permitted to do the work. Read the rating plate. Check the gas type. Look at the existing shutoff, connector, receptacle, clearances, and vent route. Then decide whether the installation in front of you matches the code assumptions in the book and the manufacturer's certified instructions.
If you want a sharper refresher before getting into the steps, review [CSA B149.1 explained for Ontario gas fitters](https://flamepath.co/csa-b149-1-explained).
YOUR FIRST CODE-COMPLIANT GAS DRYER INSTALLATION
You are in a laundry room at 7:30 a.m. The dryer is unboxed, the customer wants it running before lunch, and the old flex connector is still hanging there like an invitation to make a bad decision. This is the kind of job that exposes whether you learned the code or just memorized a few shop habits.
A first solo install has to satisfy two tests at the same time. It has to operate safely in the field, and it has to stand up to the way TSSA exam questions are framed. That means tying each decision back to the governing requirements in **O. Reg. 212/01** and **CSA B149.1**, not to what the last installer happened to do.
On the exam, candidates lose marks by treating a dryer like a minor appliance. In practice, the same mistake shows up as the wrong connector, a missing shutoff, a bad vent termination, or a pressure check that never happened. Dryer work looks simple because the appliance is small. The code treatment is not.
Read the manufacturer's certified instructions alongside the code, then apply whichever requirement is more restrictive. If you need a refresher on how the code is structured, review this breakdown of [CSA B149.1 requirements for gas appliance installations](https://flamepath.co/csa-b149-1-explained).
Treat the job like someone will inspect every choice with the code book open. Because on your ticket, and on the TSSA exam, that is exactly what is happening.
PRE-INSTALLATION SITE ASSESSMENT AND CODE REVIEW
A first solo dryer install usually goes sideways before the connector comes out of the bag. The appliance is on site, the customer wants it running today, and the laundry closet is tight, the branch valve is buried, or the rating plate says propane while the house is on natural gas. On the TSSA exam, that question is testing whether you stop the job early enough.
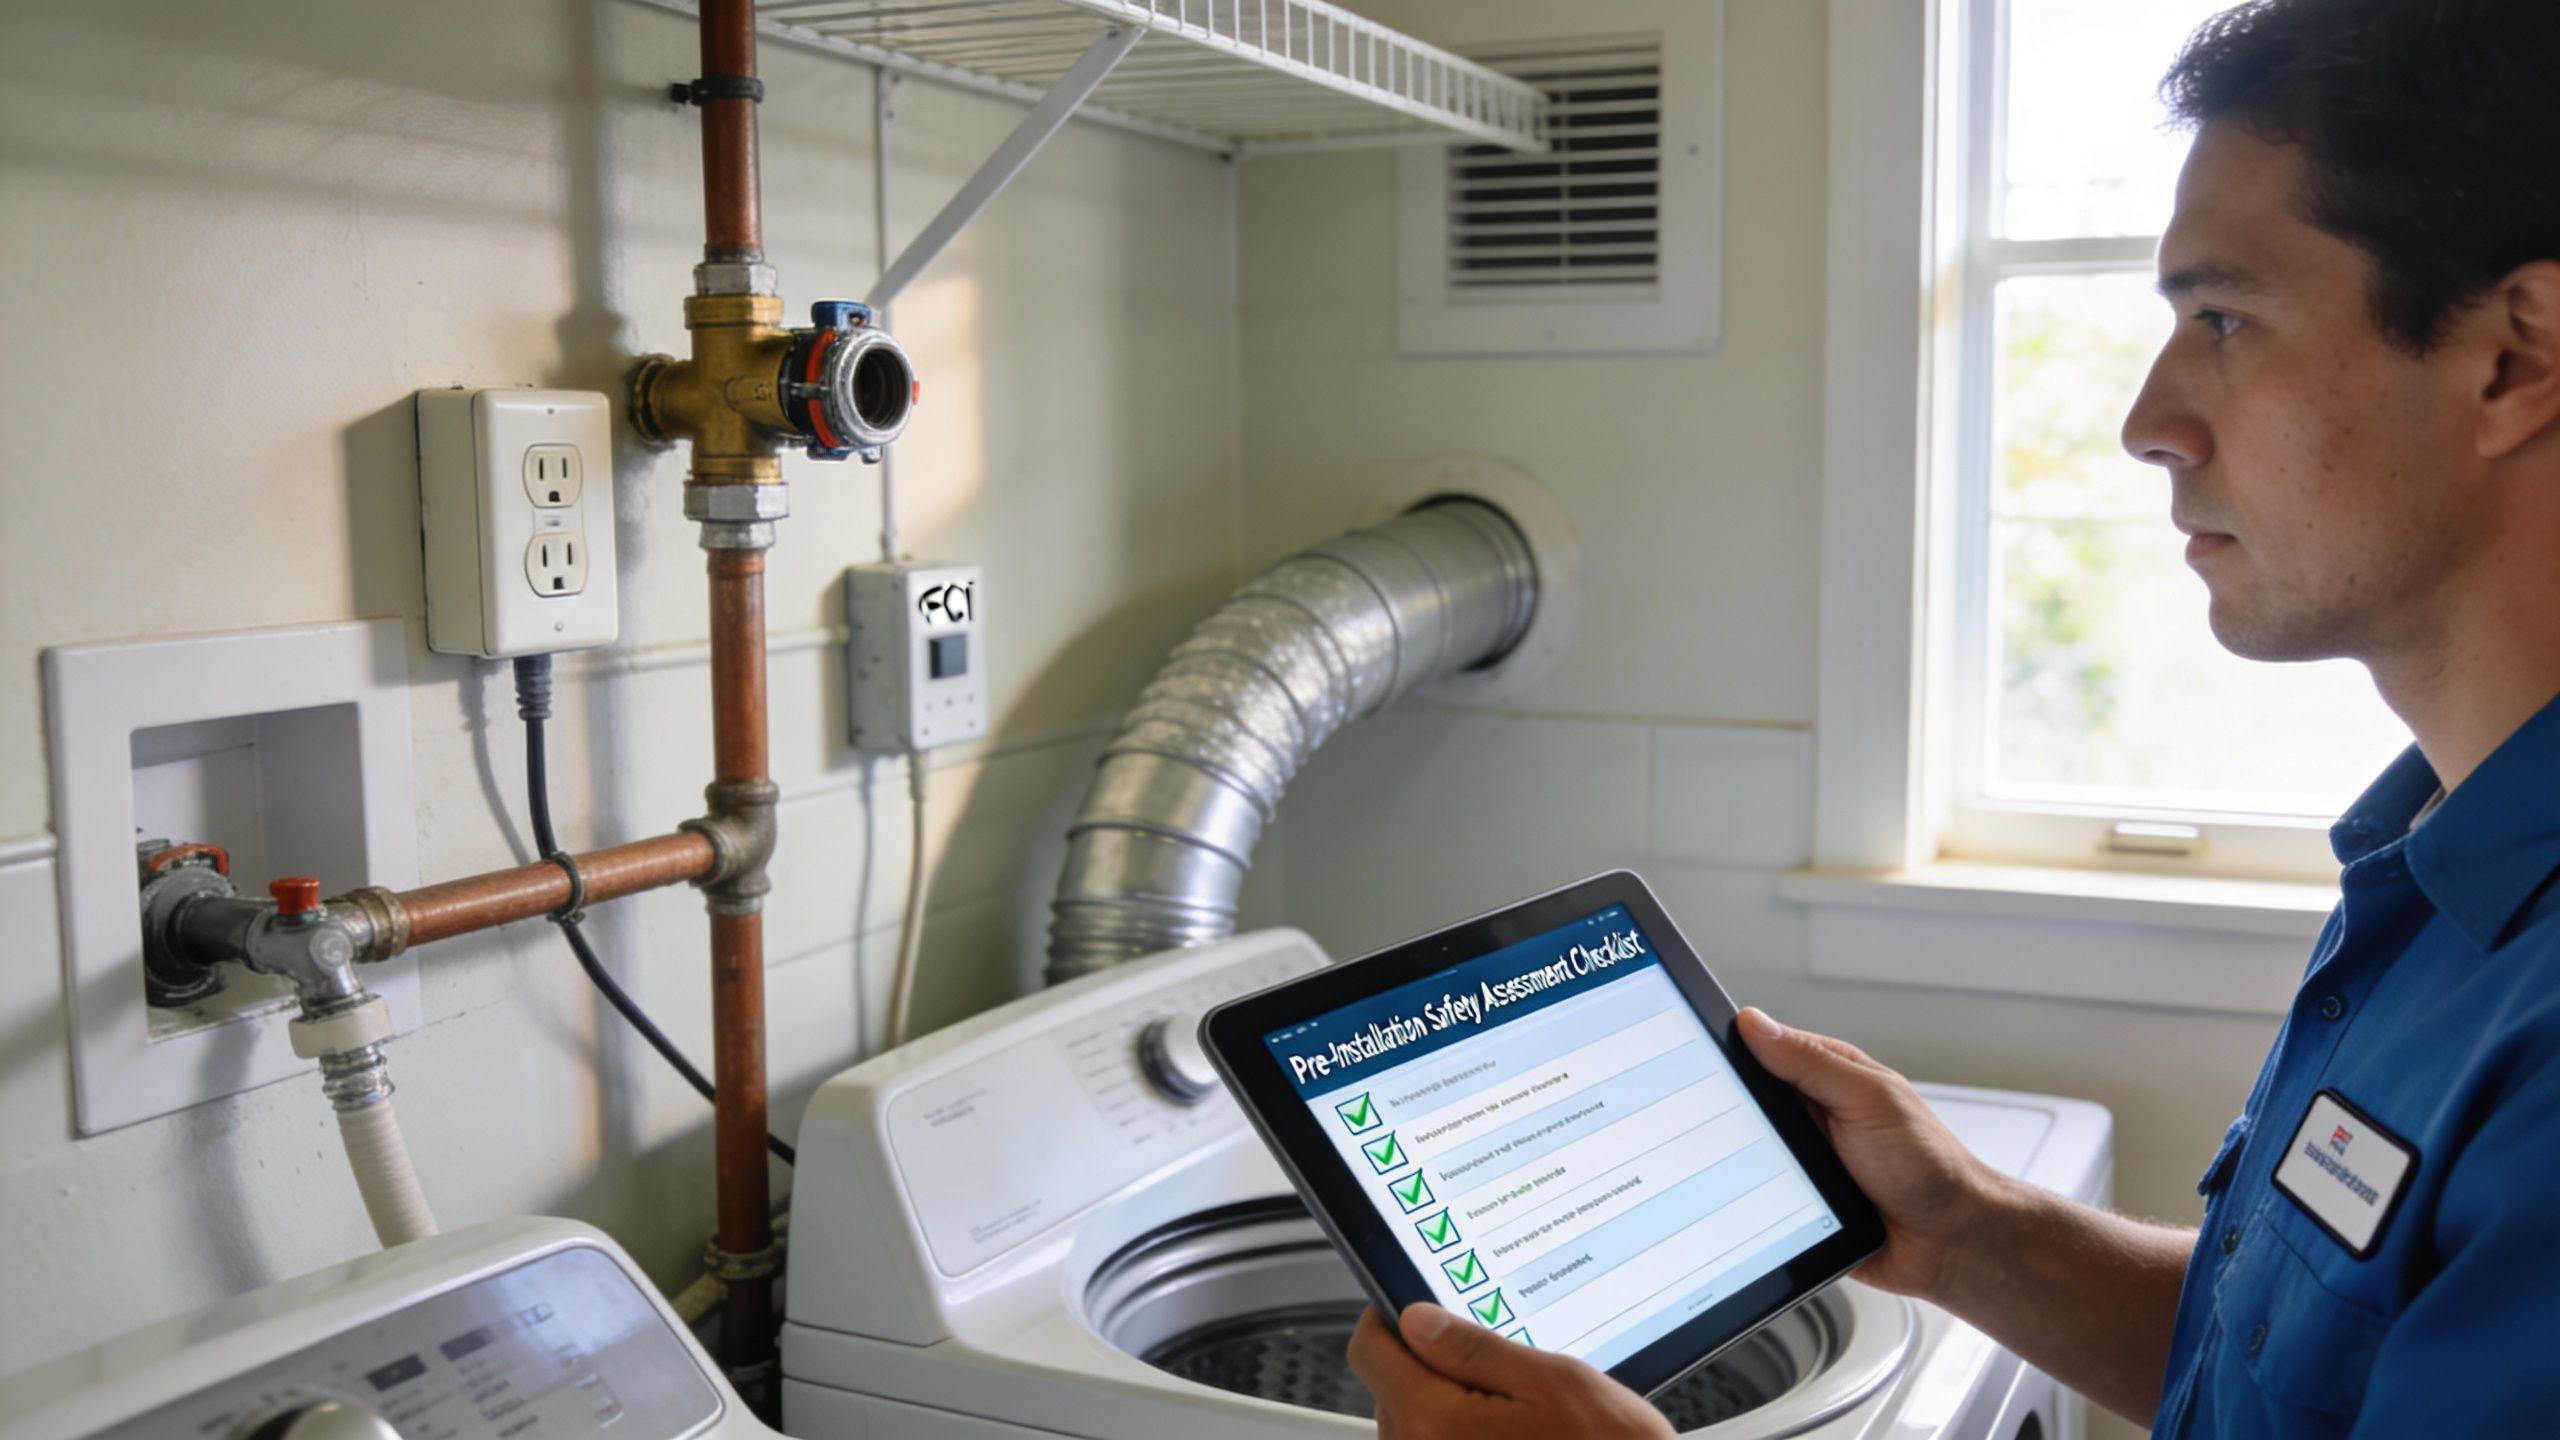
START WITH LICENCE SCOPE AND LEGAL RESPONSIBILITY
Start with authority to do the work. In Ontario, gas work must be done by the appropriate certificate holder under **O. Reg. 212/01**, and a dryer connection only stays simple if the job scope stays simple. A **G3** can perform work within the scope of that certificate. If the install turns into piping alterations beyond that scope, you stop and hand it up.
That point shows up on exams in small wording changes. A question will call it a "replacement dryer," then hide a new branch line, a relocated shutoff, or a fuel conversion in the stem. Read it like a fitter, not like a customer.
The second legal check is certification. Confirm the dryer bears an approved certification mark and that the rating plate matches the gas supplied. If the appliance is not certified for use in Canada, or if the gas type does not match the site supply, the install is dead right there.
READ THE ROOM LIKE AN EXAMINER
Before you touch the gas line, assess the room in the same order an inspector would. Start with the appliance location — you need enough space to place the dryer without crushing the connector, distorting the vent, or blocking service access to the shutoff.
Then verify the gas supply conditions:
- **Fuel type:** natural gas or propane must match the appliance input and rating plate
- **Branch piping location:** the takeoff point has to allow an approved connection without strain, sharp offsets, or hidden fittings
- **Shutoff valve access:** the manual valve must be installed where it is accessible
- **Connector route:** the connector cannot be kinked, twisted, or run through walls, floors, or the appliance casing
- **Venting path:** the room has to allow a code-compliant exhaust route using approved material and acceptable equivalent length
- **Electrical supply:** the receptacle must be properly located so cord and gas connector are not competing for the same space behind the dryer
A dryer installation is one of the clearest places where **CSA B149.1** and the manufacturer's instructions must be read together. The code gives the baseline. The certified instructions can be tighter on clearances, connector arrangement, makeup air, and vent configuration. Use the stricter requirement every time.
CHECK FOR DISQUALIFIERS BEFORE PRICING OR PROMISING ANYTHING
Some site problems are not "extras." They are stop-work items until corrected. Common examples include an inaccessible shutoff, a concealed connector path, plastic or foil exhaust duct, an appliance jammed into a closet with no practical vent route, or a supply that does not match the dryer rating plate.
If the room, piping, or venting does not meet code, the installation needs correction before connection. A firm answer at the assessment stage is a lot cheaper than a failed inspection after the dryer is in place.
ESSENTIAL TOOLS, MATERIALS, AND GAS LINE SIZING
A dryer install gets judged on small details. A connector that is not certified, sealant pushed into the first thread, a shutoff buried behind the appliance, or a branch sized by guesswork will all cost marks on a TSSA exam and fail an inspection just as fast in the field.
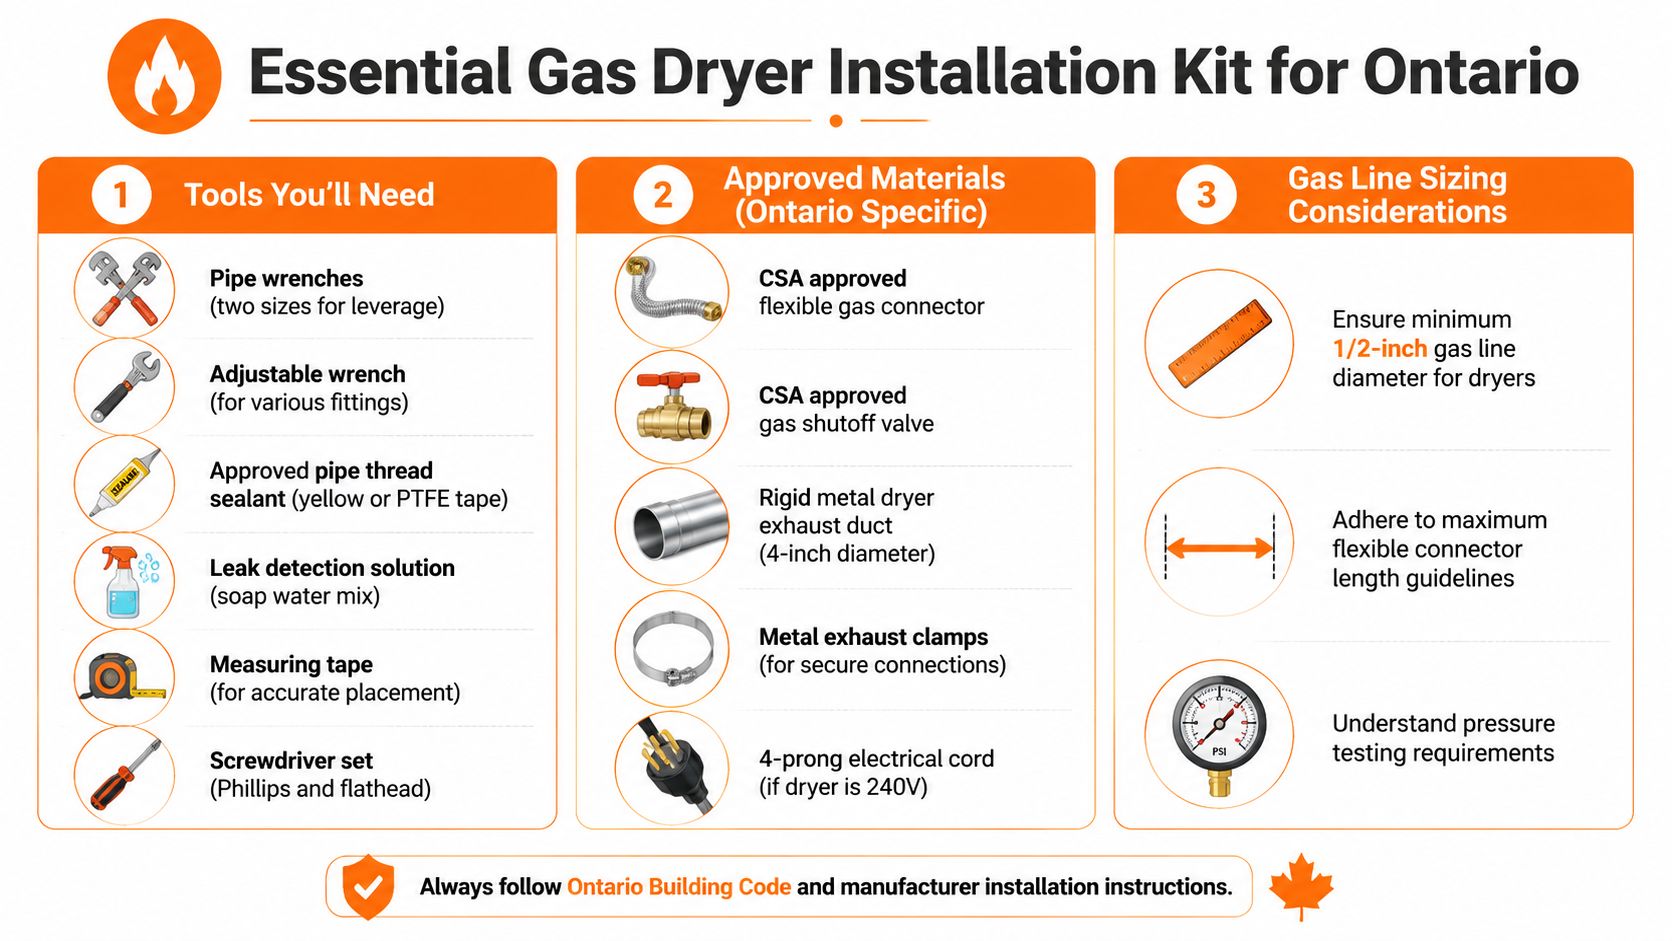
USE APPROVED GEAR AND INSTALL IT LIKE YOU EXPECT AN INSPECTOR TO LOOK AT IT
- **Two wrenches:** One turns the fitting. One backs up the mating fitting or valve body. That protects the appliance regulator connection and upstream piping from torque damage.
- **Approved thread sealant:** Use a gas-approved compound or PTFE product where the manufacturer permits it. Keep the first thread clean. Excess sealant inside the piping is a contamination issue, not a neatness issue.
- **Certified manual shutoff valve:** It has to be accessible after installation. If you need to drag the dryer out to reach it, the layout is wrong.
- **CSA-certified flexible appliance connector:** Use a connector approved for the appliance and installation. Do not reuse an old connector because it "still looks good."
- **Approved fittings and adapters:** Match thread types properly. Do not build a chain of reducing bushings and street fittings just to make old piping line up.
- **Metal vent materials:** Use rigid or semi-rigid metal duct where required. Plastic and foil duct belongs in the bin, not on a gas dryer job.
SIZE THE BRANCH FROM THE CODE TABLES, NOT FROM HABIT
Use the same sequence every time:
1. **Read the input rating** on the dryer nameplate.
2. **Confirm the gas type** and whether the appliance is set up for that fuel.
3. **Identify the longest length method** required by the sizing table in **CSA B149.1**.
4. **Add the total connected load** on the section of pipe being evaluated, not just the dryer.
5. **Select the pipe size from the applicable table** for natural gas or propane.
6. **Check the branch outlet and connector size** against the appliance connection.
For exam purposes, candidates often see a residential natural gas dryer with an appliance regulator supply in the **7 in. w.c.** range and a **1/2 in. NPT** connection. Treat that as a common case, not a universal rule. The right answer still comes from the appliance rating plate, the certified installation instructions, and the sizing tables in **CSA B149.1**.
| Check | What you confirm | Why it matters |
| --- | --- | --- |
| Appliance input | Rating plate input and fuel match the job | Prevents a mismatched or unconverted installation |
| Pipe sizing method | Correct table, correct longest length, correct connected load | Prevents pressure drop and exam table errors |
| Branch connection | Outlet size and fitting type match the appliance connection | Avoids improvised adapters and weak joints |
| Connector route | No strain, sharp bends, or concealed runs | Protects the connector and keeps the installation serviceable |
| Vent material | Proper metal duct and fitting arrangement | Prevents airflow and lint problems tied to poor material choice |
Propane is another exam trap. If the dryer is not set up for propane, you do not connect it and "see if it runs." The conversion kit, orifice arrangement, regulator setting, and manufacturer instructions all have to match the fuel before the appliance is placed in service.
THE CONNECTION PROCESS: FROM SHUTOFF TO APPLIANCE
This is the part of the job where new techs lose marks on the exam and fitters lose time on callbacks. CSA B149.1 Clause 8.25 is strict about how the appliance is connected, what materials are used, and whether the connection stays accessible and serviceable after the dryer is pushed into place.
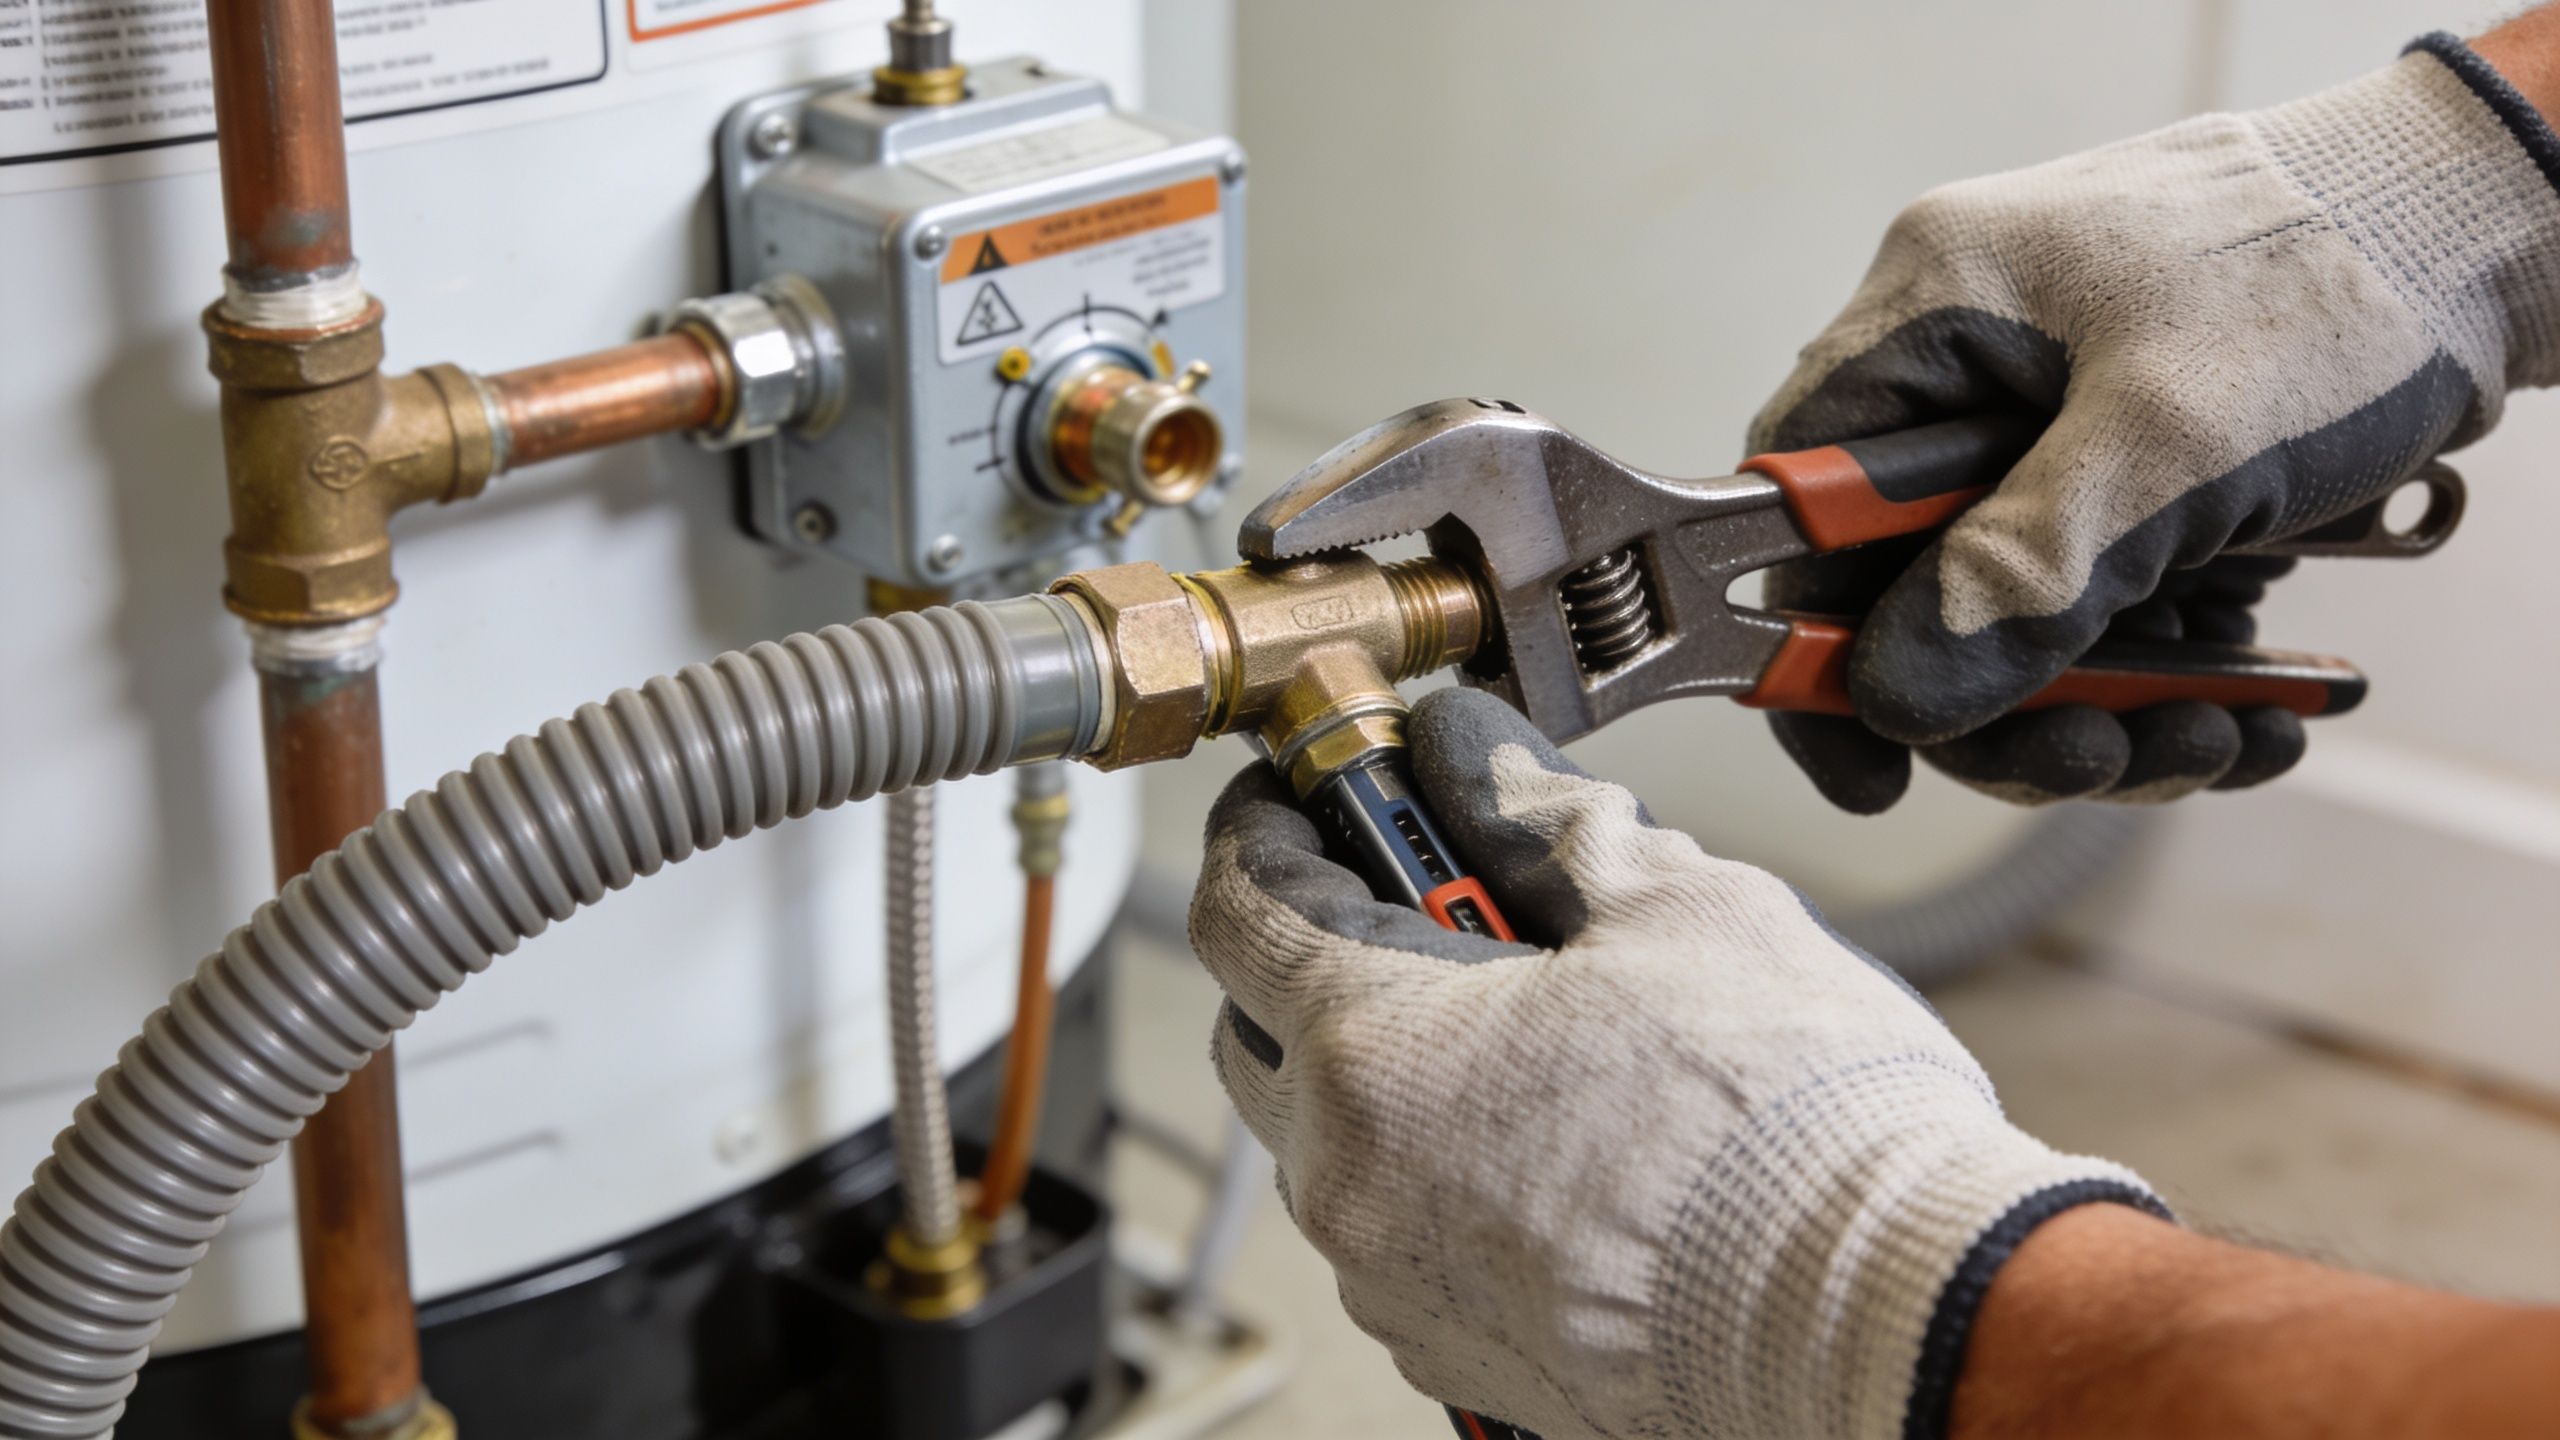
BUILD THE CONNECTION IN THE RIGHT ORDER
1. **Shut off and prove isolation.** Close the correct upstream valve. Do not trust a handle position without verifying that the branch is dead before you break a joint.
2. **Confirm the shutoff is acceptable and accessible.** The appliance shutoff has to be in the same room, upstream of the connector, and accessible after installation.
3. **Inspect the outlet and adapter arrangement.** Look for damaged threads, mixed fitting types, and improvised reducers. If you need a stack of adapters to make the connector fit, correct the rough-in.
4. **Install the sediment trap where required by code and layout.** Dirt, scale, and cutting oil travel downstream. If the branch arrangement calls for a sediment trap, install it properly.
5. **Connect with an approved appliance connector.** Use a connector certified for the appliance and gas being supplied, and do not exceed the permitted length. For a dryer, **1.5m** is the exam number new techs are expected to know. Keep the connector visible, protect it from abrasion, and never run it through walls, floors, partitions, or the appliance casing.
6. **Apply thread sealant correctly.** Use a sealant approved for fuel gas on male pipe threads only, and keep it off the first thread or two.
7. **Tighten with two wrenches and control the final position.** One wrench holds back on the valve or fixed fitting. The second turns the mating fitting. If the valve body twists with the connector, stop and correct it.
EXAM TRAPS AND INSPECTION FAILURES
The common misses are predictable:
- Shutoff not accessible after the dryer is set
- Connector too long, kinked, or crushed behind the appliance
- Connector used to correct bad rough-in alignment
- Thread sealant applied excessively or to the wrong surfaces
- Sediment trap omitted where the piping arrangement requires one
- Mixed fittings and adapters creating unnecessary joints
A lot of candidates also confuse pipe thread joints with flare connections. Dope or tape belongs on male NPT threads. It does not belong on flare seats.
> Tight is not a method. Correct assembly is the method.
VENTING, COMBUSTION AIR, AND ELECTRICAL SAFETY
Walk into a callback on a dryer install and you can usually predict the problem before you pull the unit out. Crushed transition duct. Lint-packed termination. Receptacle buried behind the cabinet where nobody can reach it.
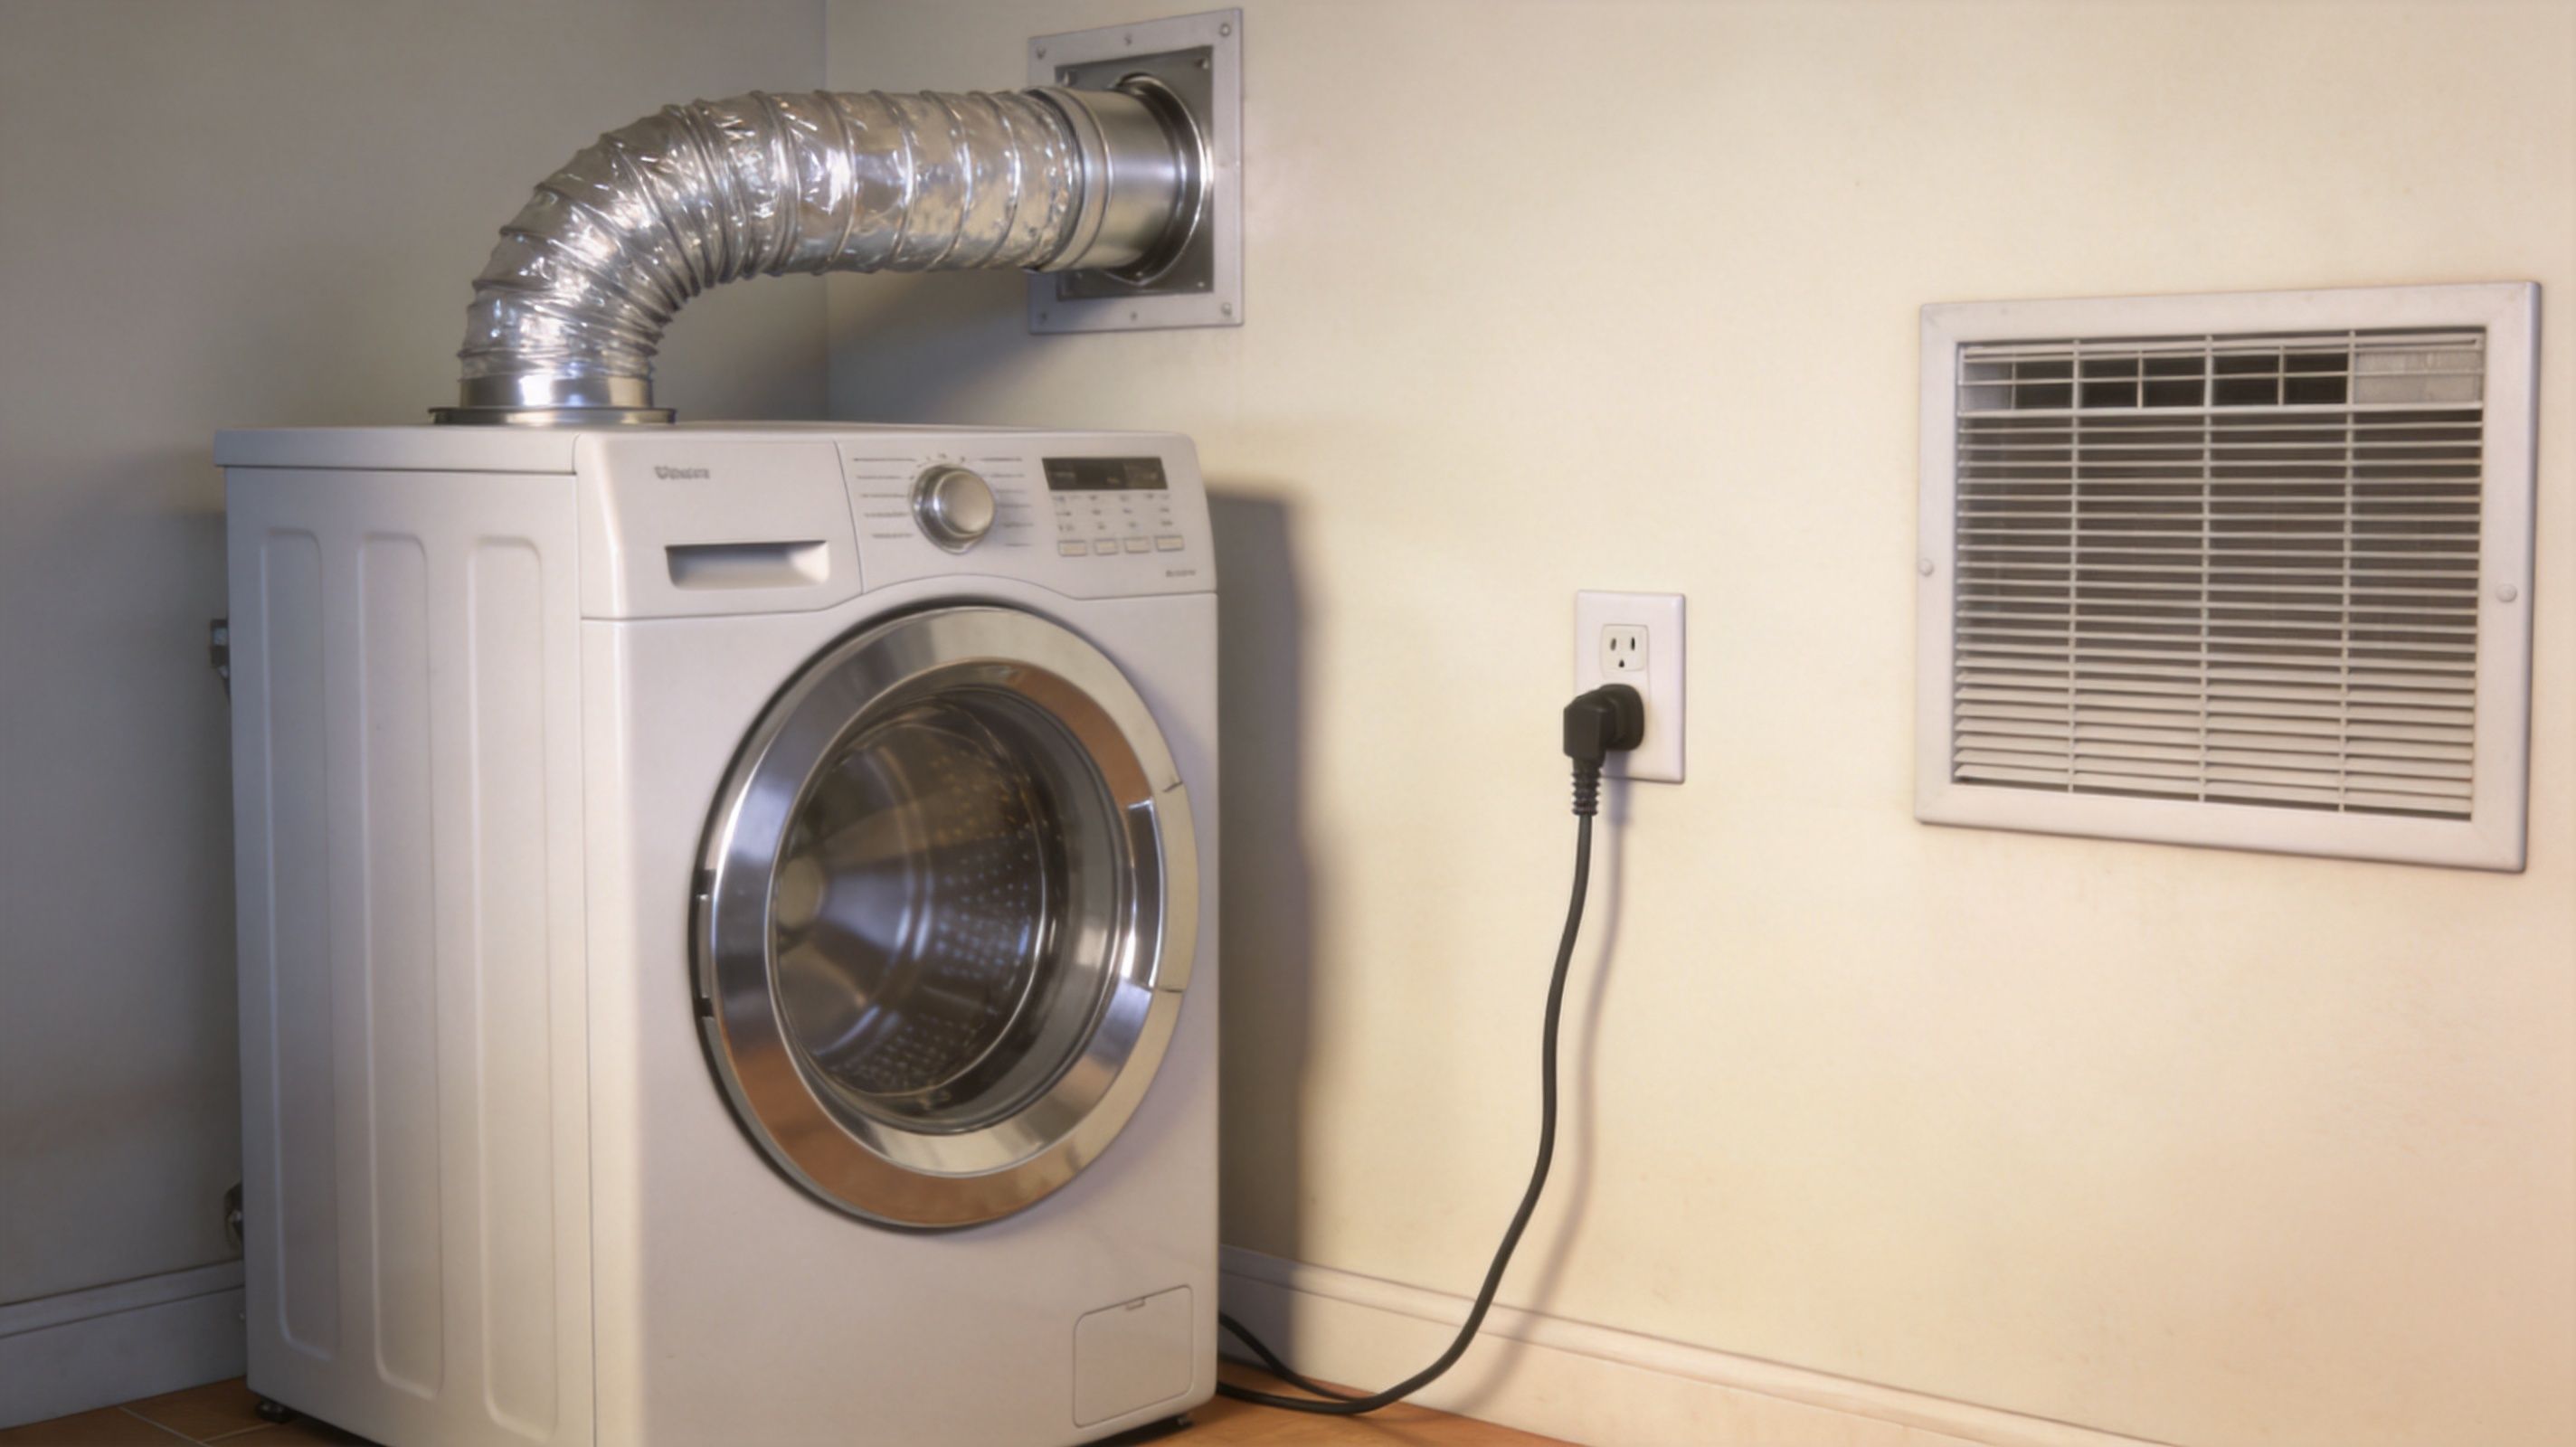
VENTING RULES THAT TRIP UP NEW TECHS
Install the dryer venting exactly as the certified appliance instructions require. CSA B149.1 requires appliances to be installed in accordance with the manufacturer's certified instructions. If the installation manual calls for 4-inch metal duct, maximum equivalent length limits, or a specific hood style, that is no longer a suggestion — it is part of a code-compliant install.
For typical residential gas dryers, manufacturers commonly require 4-inch rigid metal exhaust duct, allow semi-rigid metal transition duct in limited concealed-free runs, and prohibit plastic or thin foil duct because it sags, traps lint, and restricts flow.
Candidates get burned on vent termination details because they memorize one number and apply it to every house. The dryer exhaust termination clearances you are usually tested on come from the certified appliance instructions, not from a generic dryer cheat sheet.
Support and routing matter too. Keep the run as short and straight as the listed instructions allow, and make sure the duct is not crushed when the dryer is pushed back.
COMBUSTION AIR IS NOT OPTIONAL JUST BECAUSE THE INPUT IS SMALL
CSA B149.1 covers air supply and ventilation requirements for appliances installed in confined spaces and enclosed rooms. The sections to review are in Clause 8, especially the air-supply provisions for spaces with inadequate natural infiltration. A gas dryer in a closet is still a fuel-burning appliance. If the room volume, grille arrangement, or opening size does not meet code and the manufacturer's instructions, the install is wrong even if the connector and vent look clean.
ELECTRICAL CHECKS NEED A SOURCE, NOT A GUESS
Do not cite a random "standard dryer receptacle" from memory. The electrical supply must match the appliance rating plate and the manufacturer's installation instructions. CSA B149.1 Clause 4.2.1 sends you back to the certified instructions, and the electrical installation must comply with the Ontario Electrical Safety Code.
For many gas dryers, the manufacturer calls for a 120 V, 60 Hz, AC-only, 15 or 20 A fused electrical supply and a grounded 3-prong receptacle. Always verify the exact model.
Use this field check before final push-back:
- Venting matches the certified installation manual for diameter, material, length, and hood type
- Duct routing is supported, accessible, and not crushed or kinked
- Termination location matches the appliance instructions and does not create a hazard or allow re-entry
- Room volume and combustion air provisions satisfy CSA B149.1 Clause 8 where the space is confined or enclosed
- Receptacle type and branch circuit match the rating plate, the installation manual, and Ontario electrical code requirements
- The cord, plug, and receptacle remain accessible after installation
PRESSURE TESTING, LEAK DETECTION, AND COMMISSIONING
You finish the hookup, open the valve, and the dryer lights. A new tech may call that done. A fitter knows the job is still on the clock until the appliance passes pressure checks, leak testing, and commissioning in a sequence that would stand up to a TSSA inspection.
Keep the order straight. Confirm the appliance is approved for the gas supplied, verify inlet conditions, leak-test every joint you made or disturbed, then operate the dryer and confirm it runs safely. Candidates lose marks when they know the parts of the task but mix up the order.
VERIFY SUPPLY PRESSURE WITH AN ACTUAL INSTRUMENT
Use a manometer. Readings guessed from flame appearance will burn you on the exam.
Take the pressure at an approved test point and compare it to the appliance input requirements on the rating plate and installation instructions. Then fire the dryer and watch the inlet pressure for stability. If it sags outside the appliance's acceptable operating range, work the problem in order: undersized piping, excessive connected load, a partially closed valve, regulator trouble, or a restriction at the connector. Do not blame the gas valve in the dryer until the supply side has been proved.
LEAK-TEST EVERY DISTURBED JOINT
Apply a listed leak-detection solution at each union, valve connection, adapter, and appliance inlet you handled. Look for bubble growth, not just foam sitting on threads. If you get bubbling, isolate, remake the joint, and retest.
A passed leak test on one fitting proves one fitting. It proves nothing about the rest of the train. CSA B149.1 requires the piping and connections to be tested after installation work. Document what was tested, what instrument was used, and what the operating result was.
COMMISSION THE DRYER AS A GAS APPLIANCE, NOT JUST A BURNER
Once gas tightness and inlet conditions are confirmed, run the appliance through a normal operating cycle. Verify ignition is prompt, flame characteristics are stable, burner operation is consistent, and the appliance shuts down and restarts as intended by the controls.
The dryer has to heat, move air, and discharge products as intended by its certification and installation instructions. A burner that lights in a poorly performing dryer is not a commissioned appliance. It is an unresolved call-back.
A clean pass comes from treating commissioning as a code-based sequence: verify, test, operate, confirm, document. That is the standard you should install to every time.
FROM INSTALLATION TO CERTIFICATION WITH FLAMEPATH
A proper gas dryer installation forces you to use the same skills that show up on TSSA exams. You read the rating plate, work within licence scope, choose approved materials, think through venting, and prove the result with testing. That is G3 knowledge moving toward G2 judgment.
If you want to tighten that gap between field exposure and exam performance, [FlamePath's TSSA G2 exam prep](https://flamepath.co/g2-exam-prep) is built around **CSA B149.1** and **Ontario Regulation 212/01**, with practice that drills the exact code habits that matter on appliance installations like this.
---
If you're serious about passing your Ontario gas fitter exams, train the way you work. [FlamePath](https://flamepath.co) gives you Ontario-focused TSSA prep for G3, G2, and G1 with code-aligned practice questions, mock exams, AI tutoring, and lifetime-access study tools built around CSA B149.1 and O. Reg. 212/01.