GAS RANGE INSTALLATION A TSSA EXAM GUIDE FOR ONTARIO TECHS
Ontario G3, G2, and G1 candidates — a code-based, job-site walkthrough of gas range installation: site assessment, connectors, leak testing, clearances, anti-tip, commissioning, and the TSSA exam patterns built from real install mistakes.
# Gas Range Installation A TSSA Exam Guide for Ontario Techs
The ticket says **gas range installation**. The apprentice reads it and thinks it's a small job. Then the questions start. Is the appliance set up for the gas on site. Is the shutoff accessible. Does the connector need replacement. Are the clearances acceptable. Is the anti-tip bracket there. Will a TSSA inspector accept what gets left behind when the truck pulls away.
That's why range work matters so much in Ontario. It looks routine, but it forces you to apply code, appliance instructions, leak testing discipline, and job-site judgement all at once. Gas cooking also remains common enough that this isn't niche work. For context, the American Gas Association says **more than 42 million U.S. households** have natural gas or propane ranges, ovens, and cooktops in service, which is a useful benchmark for how established gas cooking still is across North America in work that must meet emissions and safety requirements such as ANSI Z21.1/CSA 1.1 and code obligations tied to carbon monoxide risk in improper installations ([American Gas Association fact sheet on gas ranges](https://www.aga.org/wp-content/uploads/2022/12/aga-fact-sheet-on-gas-ranges.-ranfone-11.26.19_updated-10-26-21.pdf)).
An Ontario tech preparing for a **G3, G2, or G1** exam needs more than a manufacturer's quick-start sheet. You need to know why a step matters, what failure it prevents, and what code principle sits behind it. That's what gets you through practical work and written questions.
TABLE OF CONTENTS
- [Your First Solo Install A Guide to Getting it Right](#your-first-solo-install-a-guide-to-getting-it-right)
- [Pre-Installation Site Assessment and Job Scoping](#pre-installation-site-assessment-and-job-scoping)
- [Read the site before you touch the appliance](#read-the-site-before-you-touch-the-appliance)
- [Scope the job like a technician not a mover](#scope-the-job-like-a-technician-not-a-mover)
- [Your Essential Toolkit and Materials Checklist](#your-essential-toolkit-and-materials-checklist)
- [Tools that prove the work](#tools-that-prove-the-work)
- [Materials that must match the job](#materials-that-must-match-the-job)
- [The Code-Compliant Gas Connection and Leak Test](#the-code-compliant-gas-connection-and-leak-test)
- [Make the connection without creating the defect](#make-the-connection-without-creating-the-defect)
- [Leak testing is where the install is won or lost](#leak-testing-is-where-the-install-is-won-or-lost)
- [Clearances Electrical and Anti-Tip Requirements](#clearances-electrical-and-anti-tip-requirements)
- [Why clearance numbers matter](#why-clearance-numbers-matter)
- [Anti-tip and electrical details that get missed](#anti-tip-and-electrical-details-that-get-missed)
- [Commissioning Documentation and Customer Handover](#commissioning-documentation-and-customer-handover)
- [Commission the appliance like your name is on it](#commission-the-appliance-like-your-name-is-on-it)
- [Leave a defensible paper trail](#leave-a-defensible-paper-trail)
- [Avoiding Common Failures and Mastering TSSA Exam Questions](#avoiding-common-failures-and-mastering-tssa-exam-questions)
- [The mistakes that keep showing up](#the-mistakes-that-keep-showing-up)
- [How TSSA turns job-site errors into exam questions](#how-tssa-turns-job-site-errors-into-exam-questions)
YOUR FIRST SOLO INSTALL A GUIDE TO GETTING IT RIGHT
A first solo range install usually goes the same way. You arrive thinking the hard part is making the connection. Then you realise the true challenge started before you opened the van. The customer has already pushed the old range out. The flooring is new. The cabinet opening is tight. The shutoff is buried. The appliance manual is still in plastic. Now every shortcut you were tempted to take becomes visible.
That's exactly why this job shows up so often in training and exams. A gas range installation isn't just an appliance hookup. It's a check of whether you can think like a gas technician under Ontario rules. You're expected to recognise hazards, verify conditions, install to code, test properly, and leave the appliance safe for the customer.
> **Practical rule:** If you can't explain why you're doing a step, you're not ready to defend that step to an inspector or on an exam.
The apprentices who struggle usually treat the work like plumbing with ignition. The ones who progress treat it like controlled fuel work. They pay attention to shutoff access, connector condition, cabinet clearances, appliance rating information, and final verification. That habit matters because TSSA exam questions rarely ask whether you can turn a wrench. They ask whether you understand what makes an installation compliant.
On a real Ontario job, that difference shows up fast. If the line material is wrong, if the connector is being reused, if the receptacle is in the wrong place, or if the anti-tip bracket is missing, the job is already off track. You don't get points for getting gas to the burner if the installation fails on safety.
PRE-INSTALLATION SITE ASSESSMENT AND JOB SCOPING
The best install decisions happen before the appliance is unboxed. A proper site assessment keeps you from inheriting someone else's problem and calling it a surprise later.
READ THE SITE BEFORE YOU TOUCH THE APPLIANCE
Start with the appliance itself. Confirm the **rating plate**, fuel type, and any manufacturer-specific installation instructions. Don't assume the delivered range matches what was ordered, and don't assume a converted unit was converted correctly. If the appliance setup and site fuel don't match, stop there.
Then inspect the supply side:
- **Gas type check:** Confirm whether the home is on natural gas or propane and verify the appliance is configured for that fuel.
- **Shutoff location:** The shutoff has to be accessible and usable. If it's hidden behind a fixed obstruction or can't be reached without moving the appliance unsafely, that needs to be addressed.
- **Existing piping condition:** Look for poor routing, damage, unsupported sections, or fittings that raise questions before you add anything new.
- **Appliance space:** Check side walls, overhead cabinets, floor condition, and whether the range can sit square without stressing the connector.
- **Ventilation and surroundings:** If there's a hood, cabinet, or backsplash detail that changes the install conditions, note it now, not when the range is halfway in.
A lot of callbacks start with one missed visual clue. The apprentice sees a stub-out and assumes the job is ready. The experienced tech asks whether that stub-out is usable, legal, accessible, and appropriate for the new appliance.
> On exam day, the wrong answer is often the one that assumes existing work is acceptable just because it's already there.
SCOPE THE JOB LIKE A TECHNICIAN NOT A MOVER
Job scoping is where technical judgement meets estimating. If the site needs new piping, fitting changes, venting-related coordination, permit work, or electrical correction, the install cost changes because the risk and labour change with it.
For Ontario estimating, adjacent market reporting is useful as a benchmark. Ontario jobs are priced based on site conditions — distance from supply, line sizing needs, permit requirements, and whether existing piping is usable all affect the final number.
That doesn't mean you quote from a blog. It means you understand the same cost drivers on Ontario jobs:
1. **Distance from available gas supply** increases labour and material.
2. **Line sizing concerns** can turn a simple hookup into a correction job.
3. **Cabinet or finish constraints** slow the work and affect connector routing.
4. **Permit and inspection requirements** can change sequencing.
5. **Electrical readiness** can stop a gas job cold if the receptacle situation is wrong.
A weak pre-check leads to a bad quote, a rushed install, and a nervous final test. A strong pre-check gives you control of the job from the first minute.
YOUR ESSENTIAL TOOLKIT AND MATERIALS CHECKLIST
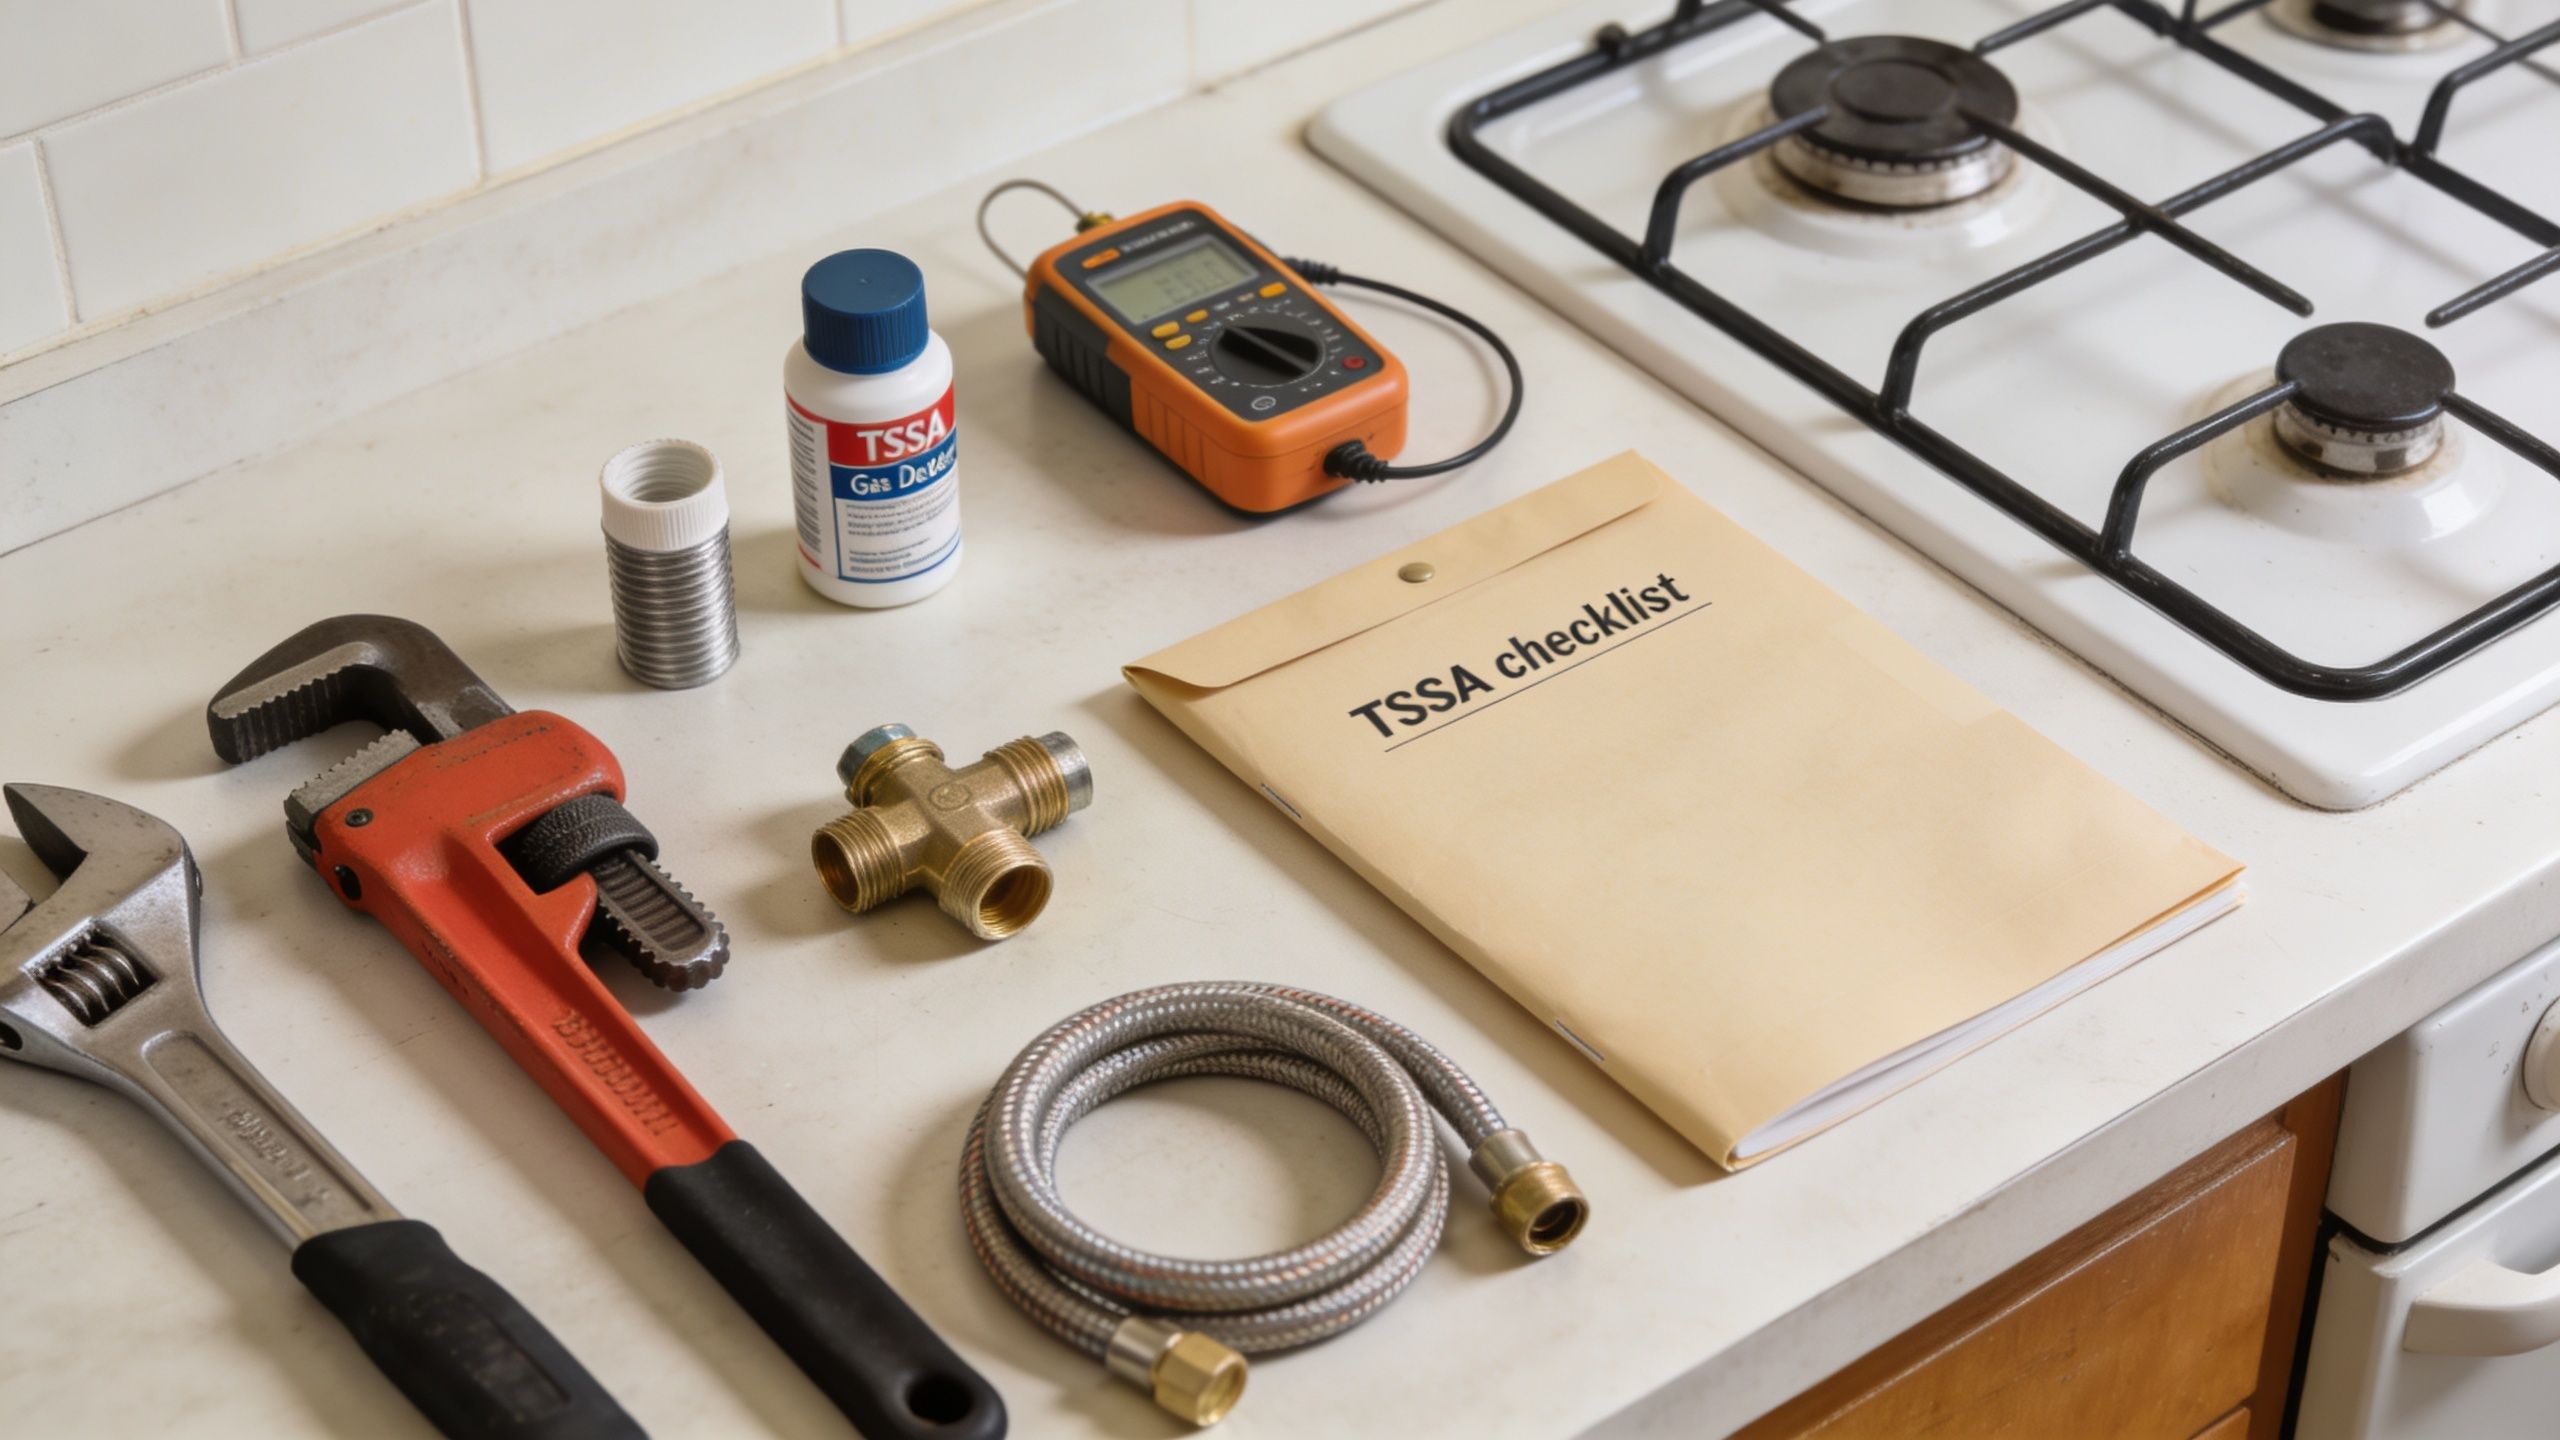
A gas range install doesn't require the biggest tool list in the trade. It does require the right tools, in working condition, with no improvising.
TOOLS THAT PROVE THE WORK
A pair of adjustable wrenches matters more than people think. One turns. One holds back. If you only pull on one side of a fitting assembly, you can transfer stress into the valve, stub, or appliance connection and create the defect you'll later be chasing with a detector.
Your core kit should include:
- **Two wrenches:** For tightening with proper hold-back so fittings and valves aren't twisted out of position.
- **Electronic gas leak detector:** For checking newly made joints before the range is pushed fully into place.
- **Approved leak detection solution:** Useful for confirming suspect points visually.
- **Manometer or digital pressure gauge:** Needed when testing procedures require pressure verification and when you need actual readings instead of assumptions.
- **Nut drivers and basic hand tools:** For access panels, anti-tip bracket work, and appliance adjustments.
- **Lighting and inspection mirror:** Helpful in tight cabinet openings and behind ranges where line routing is hard to see.
The exam version of this question often hides the actual point. It won't ask which wrench brand you prefer. It asks which tool verifies the system and which one merely helps assemble it.
MATERIALS THAT MUST MATCH THE JOB
Materials are where a lot of apprentices get casual. That's a mistake. The fitting or sealant choice isn't a preference issue. It's a compliance issue.
Keep these on hand and use them deliberately:
- **New certified flex connector:** Never treat this as reusable stock from the old install. A replacement range needs a new connector.
- **Correct fitting adapters and street elbow where required:** Match the appliance connection and keep routing clean without forcing alignment.
- **Yellow gas-rated Teflon tape:** For natural gas threaded fittings where tape is permitted by the applicable procedure and fitting type.
- **Manufacturer paperwork:** Not a material in the usual sense, but you need the manual and installation instructions in front of you, not in your memory.
- **Anti-tip bracket hardware:** If the bracket is missing from the box or lost on site, the job isn't complete.
> A clean-looking installation can still be a failed installation if the wrong connector, wrong sealant, or wrong support method was used.
The best apprentices lay out tools and materials before they start. Not because it looks organised, but because it prevents mid-job substitution. That's usually when bad decisions happen.
THE CODE-COMPLIANT GAS CONNECTION AND LEAK TEST
The connection sequence is where a routine range install becomes exam material. Every small detail has a reason. If you skip the reason, you usually create the defect.
MAKE THE CONNECTION WITHOUT CREATING THE DEFECT
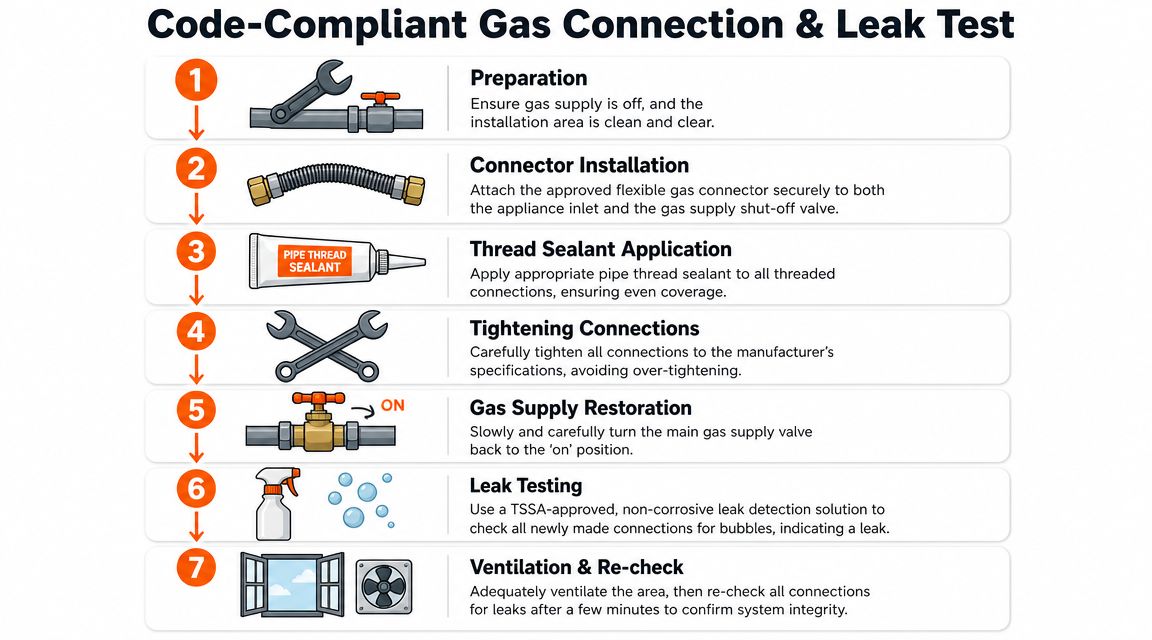
Start with isolation and preparation. Confirm the supply is off and the work area is clear. Position the appliance so you can work comfortably without putting side load on the inlet connection or crushing the connector as you move the unit.
The connector itself needs attention before you thread anything. A professional gas range installation requires the correct flex connector, typically **½ inch diameter**, appropriate to the appliance model, and a **new connector is mandatory when replacing an existing range**. The end cap must be removed before tape application and threading, the connector must never be forced, and it has to remain free of kinks with enough leeway to prevent stress damage. Mandatory leak testing with a gas leak detector comes before the range is slid into its final position, and a straightforward range swap on a prepared site typically takes one to two hours for an experienced technician.
That sequence matters. If you force a connector into alignment, you haven't solved a routing problem. You've built one into the installation.
A detail that gets tested constantly is thread sealing. For natural gas fittings, **yellow gas-rated Teflon tape** is the correct tape. It must be applied a minimum of two to three wraps in a clockwise direction on valve threads. White tape is unsuitable, and applying the tape incorrectly creates a non-compliant connection and a common source of gas leak callbacks in residential work ([Whirlpool gas or electric range installation guide](https://www.whirlpool.com/blog/kitchen/how-to-install-gas-or-electric-range.html)).
Use that rule exactly as taught:
- **Two to three wraps minimum**
- **Clockwise direction**
- **Yellow gas-rated tape**
- **No sloppy overlap into the opening**
- **No over-tightening after assembly**
Street elbow connections also need careful handling. Too loose leaks. Too tight can damage the fitting or create small fractures. Those are the leaks that waste the most time because they may not show themselves immediately in a casual visual check.
For anyone studying code application in practice, a good companion explanation is [CSA B149.1 explained in practical terms](https://flamepath.co/csa-b149-1-explained).
LEAK TESTING IS WHERE THE INSTALL IS WON OR LOST
A connection isn't finished when it feels tight. It's finished when it passes testing. That distinction matters on site and on the exam.
When gas is restored, test every newly made joint methodically. Don't jump straight to pushing the appliance into place because you want the kitchen to look finished. Once the range is back and the connector is hidden, your access gets worse and your chance of missing a problem goes up.
Use a consistent routine:
1. **Restore gas slowly** so you're not shocking the assembly.
2. **Check each joint with a proper gas leak detector** before the range is moved back.
3. **Apply approved leak detection solution where needed** to confirm any questionable indication.
4. **Watch the connector path** while the appliance is moved. Make sure it doesn't kink, rub, or get trapped.
5. **Re-check after positioning** if access and routing allow.
> If your leak test is rushed because the connector is hard to reach, the installation sequence was wrong.
Apprentices often ask what the examiner wants to hear. The answer is simple. They want to know you understand that leak testing is systematic, not symbolic. You don't wave a detector near the back of the appliance and call it done. You verify each connection made during the install.
A good install feels boring at this stage. No alarm. No bubbles. No smell. No drama. That's the standard.
CLEARANCES ELECTRICAL AND ANTI-TIP REQUIREMENTS
A lot of range installs fail for reasons that have nothing to do with the gas joint itself. The appliance can be leak-free and still be wrong. That's where clearances, anti-tip protection, and electrical readiness come in.
WHY CLEARANCE NUMBERS MATTER
Residential and commercial work don't get treated the same under Ontario rules, and apprentices need to stop lumping them together. That distinction shows up in exam questions and in inspections. For residential ranges, manufacturer instructions often reflect code-driven safety clearances that must be respected.
A useful example comes from GE appliance documentation, which commonly specifies **6 inches of side clearance** and a minimum of **18 inches from the cooktop to an unprotected cabinet above** for residential range installations ([GE range clearance guidance](https://products.geappliances.com/appliance/gea-support-search-content?contentId=16627)). Those numbers aren't decoration in a manual. They tie back to safety logic around combustibles, heat exposure, and installation environment.
Here's a simple study table for common residential review.
| Location | Minimum Clearance to Combustible Material | CSA B149.1 Clause Reference (Example) |
| --- | --- | --- |
| Side clearance | 6 inches | Manufacturer requirement derived from applicable residential safety clauses |
| Cooktop to unprotected cabinet above | 18 inches | Manufacturer requirement derived from applicable residential safety clauses |
| Rear and adjacent surfaces | Follow manufacturer instructions and applicable code | Confirm against appliance listing and installation instructions |
That table is not a substitute for reading the code book and appliance manual together. It's a reminder that your answer on an exam should reflect both.
For a related Ontario-specific breakdown, see [this gas oven installation exam guide for Ontario](https://flamepath.co/blog/gas-oven-installation-ontario-tssa-exam-guide).
ANTI-TIP AND ELECTRICAL DETAILS THAT GET MISSED
The anti-tip bracket is one of the easiest items to ignore because the range appears stable without it. That's exactly why it gets missed. The appliance can tilt forward when weight is applied to an open oven door or a loaded rack. Anti-tip brackets are required for all free-standing gas ranges under ANSI Z21.1 — install it and verify engagement regardless of what the packaging implies. Don't leave it in the packaging and tell yourself the floor is level enough.
Check these points before handover:
- **Bracket location:** Installed where the manufacturer specifies, not where it's easiest to drill.
- **Floor type:** Wood, tile, or concrete changes how you fasten it, but not whether you need it.
- **Range engagement:** Confirm the leg or rear foot locks into the bracket once the range is in place.
Electrical details matter too. Most gas ranges still need an electrical connection for ignition and controls. On site, that means you need a suitable receptacle in a location that doesn't interfere with the appliance sitting properly or force the cord into a pinch point.
A common job-site mistake is treating the electrical side as someone else's issue until the range won't push back. It becomes your issue the moment it affects placement, anti-tip engagement, or safe operation.
> A range that only fits when the cord is crushed or the connector is bent does not fit.
COMMISSIONING DOCUMENTATION AND CUSTOMER HANDOVER
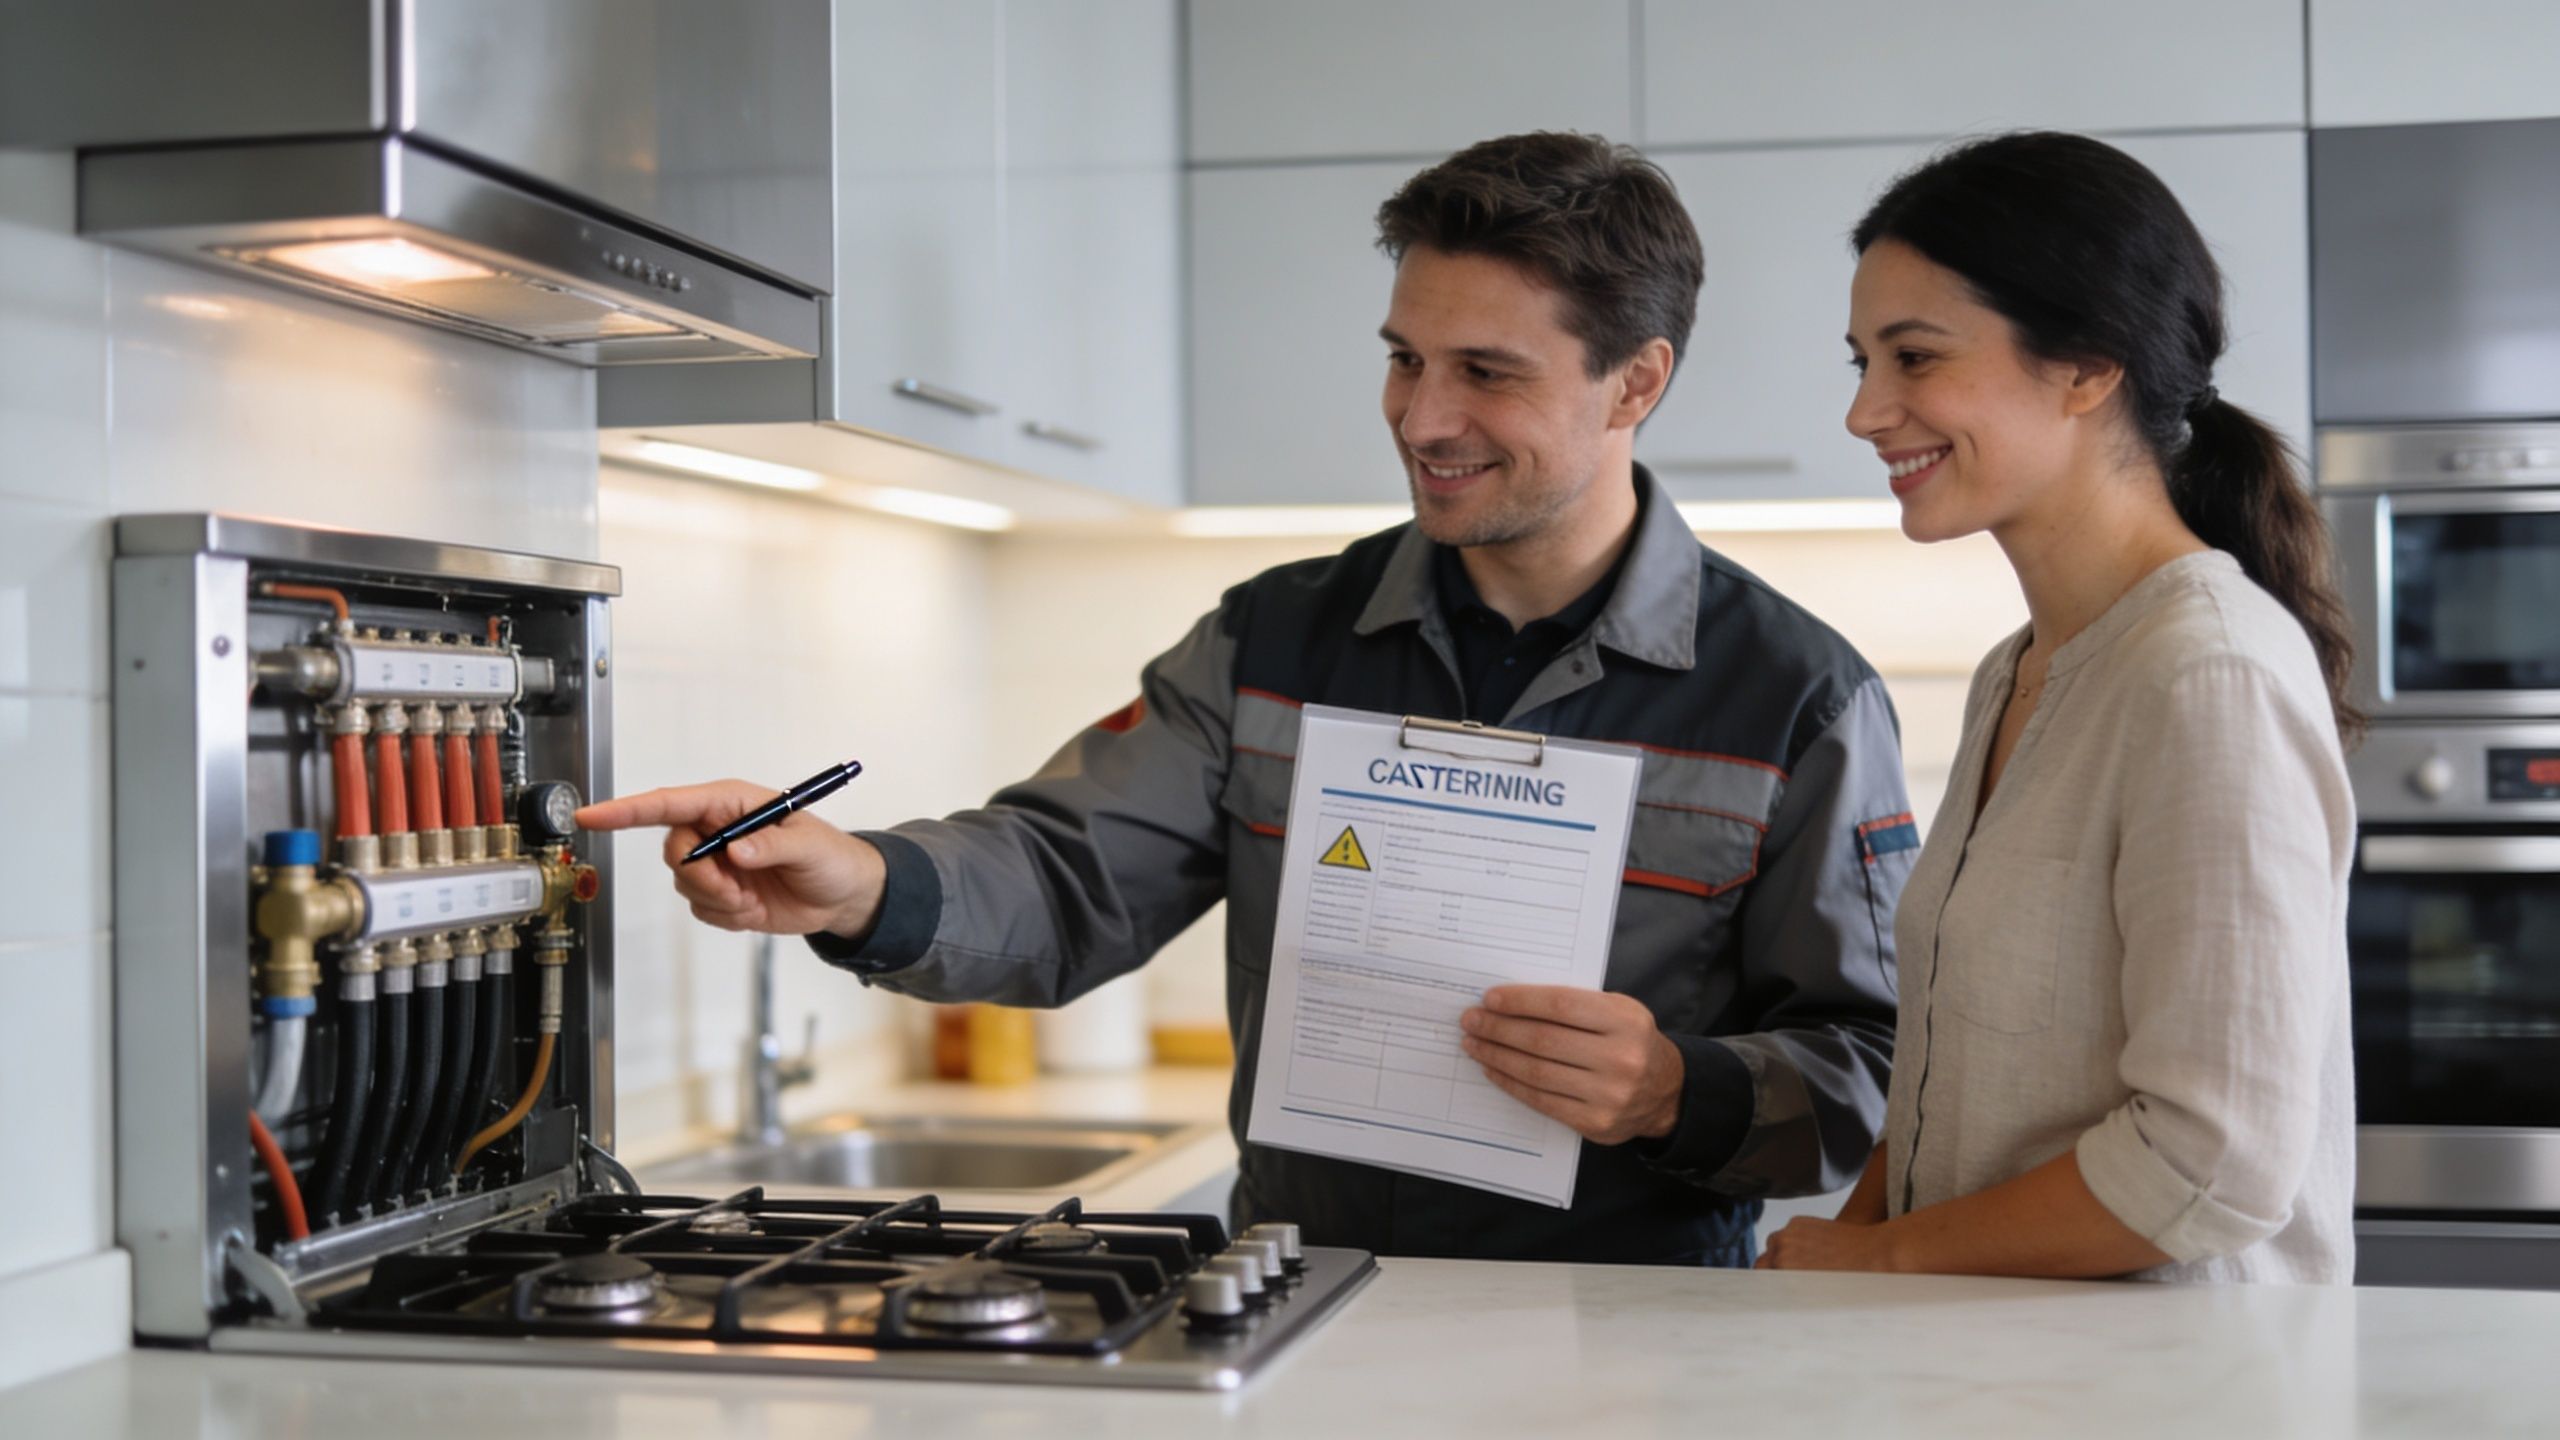
A professional installation ends with proof, not with cleanup. Commissioning is where you confirm the appliance operates as intended after all mechanical work is complete.
COMMISSION THE APPLIANCE LIKE YOUR NAME IS ON IT
Run the appliance through normal operating checks. Verify ignition. Observe burner operation. Watch for stable flame behaviour and any sign that something isn't right. If the appliance has adjustable components or commissioning steps in the manual, follow them.
Your final check should include:
- **Ignition response:** Burners should light properly and consistently.
- **Flame observation:** Look for normal operation and investigate anything irregular.
- **Appliance position:** Confirm the range is level, stable, and fully seated without stressing gas or electrical connections.
- **Control function:** Make sure the customer can use the appliance safely.
This part matters because an installation can pass a leak test and still be unfinished. If ignition is unreliable, the range rocks, or the anti-tip engagement wasn't verified, the customer doesn't have a completed job.
LEAVE A DEFENSIBLE PAPER TRAIL
Documentation protects everyone. Record what appliance was installed, what was changed, what safety checks were performed, and any site conditions that mattered. If your company uses tags, labels, commissioning sheets, or digital closeout notes, complete them properly.
Then do the customer handover in plain language:
1. **Show the emergency gas shutoff** and make sure the customer knows what it controls.
2. **Explain normal operation** of burners, controls, and any first-use expectations from the manufacturer.
3. **Point out safety features** such as the anti-tip bracket and why the appliance shouldn't be pulled out casually.
4. **Document outstanding issues** if another trade still needs to correct something.
A rushed handover causes almost as many headaches as a rushed install. Customers move ranges to clean, unplug them, block access, or forget where the shutoff is. If you didn't explain it, don't act surprised later.
> The cleanest closeout is one where the customer knows how to use the appliance and your paperwork shows exactly what was done.
AVOIDING COMMON FAILURES AND MASTERING TSSA EXAM QUESTIONS
Most TSSA gas exam questions are built from the same pattern. A technician misses a detail on site. The exam turns that mistake into a scenario and asks whether you can spot the problem before it becomes unsafe.
THE MISTAKES THAT KEEP SHOWING UP
One of the biggest is reusing an old connector. That's wrong on a replacement install. Another is pushing the range back before proper leak checking is complete. Another is letting the connector kink because the stub-out, elbow, and appliance inlet don't line up cleanly.
The practical standard is clear. **New flex connectors are mandatory when replacing a gas range**, the connector must **never be kinked**, and it must be **tested for leaks with a proper gas detector before the range is pushed into place**. Installers often estimate **4 to 6 hours for a two-person job** when no pre-existing issues are found ([Ontario gas fitter exam prep context for range installation topics](https://flamepath.co/g3-gas-fitter-exam-prep-ontario)).
Other repeat failures include:
- **Missing anti-tip bracket:** The gas side may be correct, but the installation still isn't complete.
- **Bad clearance judgement:** The range physically fits, but it doesn't meet the required surrounding conditions.
- **Poor thread sealing practice:** Wrong tape, wrong direction, or too much force on the fitting.
- **Weak handover:** The customer doesn't know shutoff location, safe operation, or what not to tamper with.
HOW TSSA TURNS JOB-SITE ERRORS INTO EXAM QUESTIONS
On the exam, you won't usually be asked, "What mistake did the apprentice make on Maple Street?" You'll get a multiple-choice scenario with one compliant answer and three shortcuts dressed up as practical decisions.
Train yourself to look for these signals:
- **Any answer that reuses old gas components** is suspicious.
- **Any answer that skips verification** after assembly is usually wrong.
- **Any answer that treats manufacturer requirements as optional** is dangerous.
- **Any answer that ignores Ontario code context** is incomplete.
The strongest study habit is to ask one extra question every time you review a practice problem: *What defect is this question trying to stop me from creating on a real job?* If you can answer that, you're learning the trade, not just memorising keys.
A good gas range installation teaches the same lesson every time. The obvious part of the work is rarely the risky part. The risky part is the detail you think nobody will notice.
* * *
If you're preparing for a TSSA gas exam in Ontario, [FlamePath](https://flamepath.co) is built for exactly this kind of code-based, job-site thinking. It helps G3, G2, and G1 candidates practise with Ontario-focused questions, identify weak spots, and turn everyday install details into exam-ready judgement.